|
Quickstart
Here we will take a quick look at how Simle Graph Editor works and will learn the basics on how to use it.Building the graph
To get started the first step is to place a Waypoint Cluster script in the scene. You can do so by dragging and dropping the script on a GameObject or by going to the menu GameObject > Place Waypoints at the bottom of the list.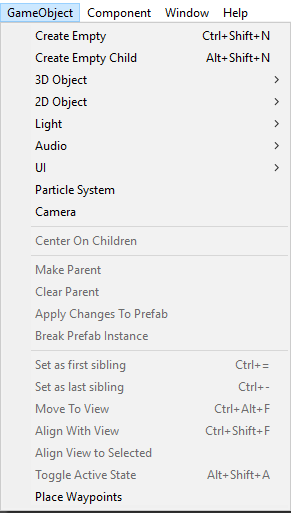
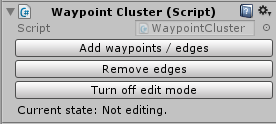
Once clicked a new object will appear on the scene called "Waypoint Editor". If you click on that object you will see three buttons and at the bottom a message telling you if you are adding waypoints, removing them or not editing, depending on the button pressed.
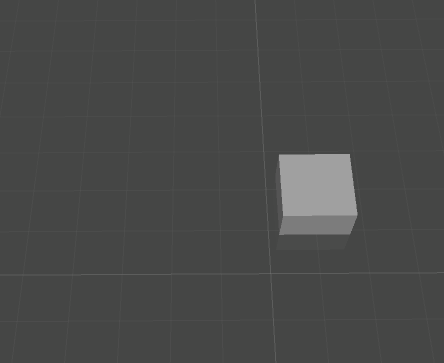
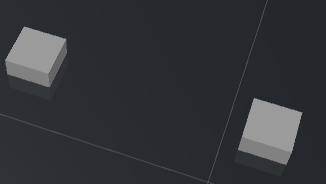
To start placing waypoints click on the "Add waypoints / edges" button and click anywhere in the scene and the waypoint will appear. When doing this bear in mind that to place a waypoint you need to have a collider on the object you want to place it. Once done the waypoint will appear on the scene tab, represented by a grey cube.
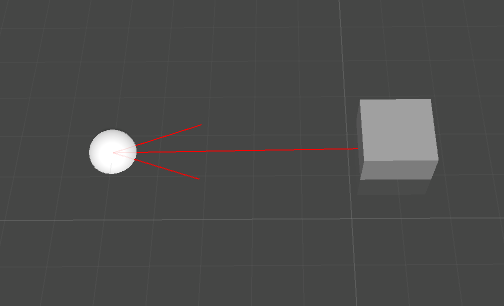
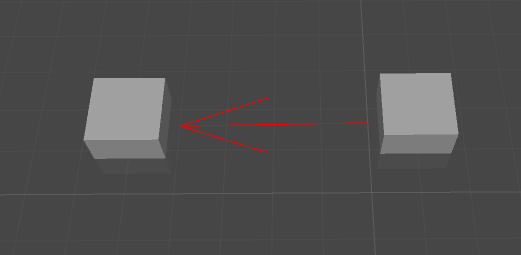
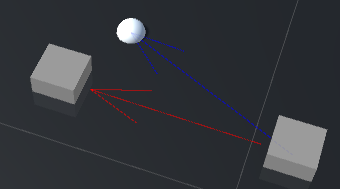
Great! We now know how to place waypoints so lets see how to create edges between the waypoints to link them. To create a connection to a waypoint its just as easy as clicking on the source waypoint and drag the mouse to the destination waypoint. While dragging you will see a "preview" like the one in the image below. When on "preview mode" you can right click at any time to cancel the action. If you release the mouse button a waypoint will be created and linked automatically:
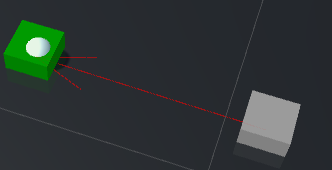
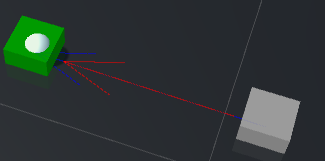
But what if you want to link two existing waypoints? To do that is the same, click on the source waypoint and drag the mouse to the destination waypoint. When you place the mouse on top of the destination waypoint it will turn green, that means that a link between them is going to be created if you release the mouse now:
Now lets learn how to remove waypoints and edges. To remove a waypoint its just as easy as clicking on it on the scene, when selected the waypoiny will be marked in yellow, then press the delete key and the waypoint and all of its links will be gone.
To remove links between waypoints go to the waypointEditor object again and click on the "Remove edges" button. The current state will say that you are now removing links between waypoints.
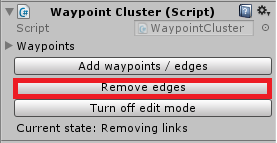
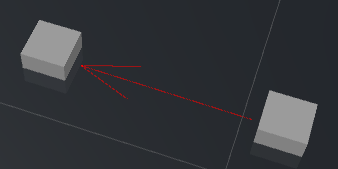
Now click on a waypoint and drag the mouse, a blue preview line will appear to help you see which direction of the graph you are going to remove. Drag it to the destination waypoint and release the mouse button. Now the edge between those waypoints will be gone. When removing edges please bear in mind that this is a directional graph, if the edge is bi-directional you will have to individually delete both directions.
Once you are done editing remember to click the "Turn off edit mode" button to avoid placing waypoints unintentionally.
Edge weights
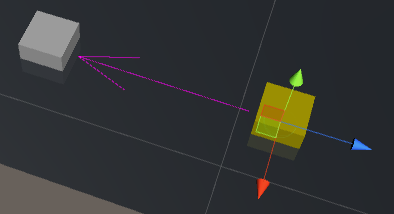
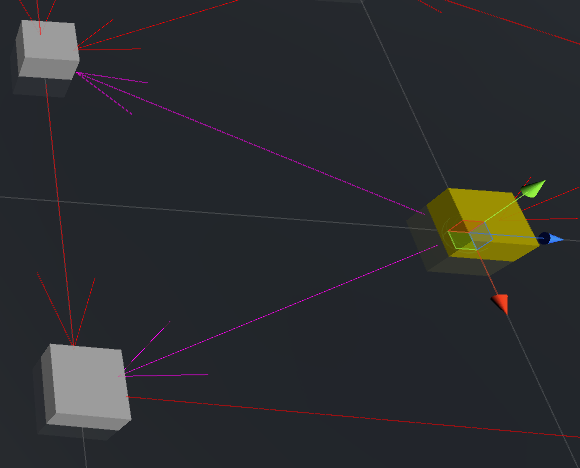
This asset also offers a very handy built-in edge weighting.When selecting a waypoint by clicking on it, it will be marked in yellow and all the outgoing edges will be marked in pink:
If you now take a look at the inspector you will see the properties of those edges inside the "Way Point" script. The "Outs" property contains a list of all the edges going out from this waypoint (marked in pink) and the probability of going through that edge. This probability is used when calling the .getNextWaypoint() function. You can check an example on the random path section to see in detail how this works.
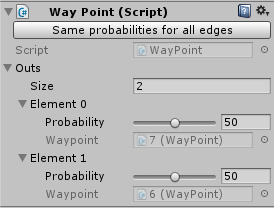
The probabilites of selecting each waypoint can be changed individually by using the slider. The waypoint itself is a read-only property, but if you double click it the waypoint pointed will be selected.